How to Install Landscape Edging: A Step-by-Step Guide
A neat and well-defined yard can make a home look polished, but without proper edging, things can get messy fast. Grass creeps into flower beds, mulch spills onto walkways, and before you know it, the clean lines you wanted are nowhere to be found. That's where landscape edging comes in—it keeps everything in place, giving your outdoor space a structured, tidy look.
If you've ever wondered how to install landscape edging without it looking like a rushed weekend project, you're in the right place. With the right materials and simple steps, you can create crisp edges that make your yard look professionally landscaped.
Choosing the Best Landscape Edging for Your Yard
The right edging does more than separate your lawn from flower beds—it adds structure, enhances curb appeal, and makes yard maintenance easier. But with so many options, choosing the best fit depends on a few key factors: durability, aesthetics, budget, and maintenance.
Popular Landscape Edging Options
Metal Edging – A great choice for a sleek, modern look. It's durable, resists rust, and works well for clean, straight lines. Learning how to install metal landscape edging is simple, making it a favorite for low-maintenance yards.
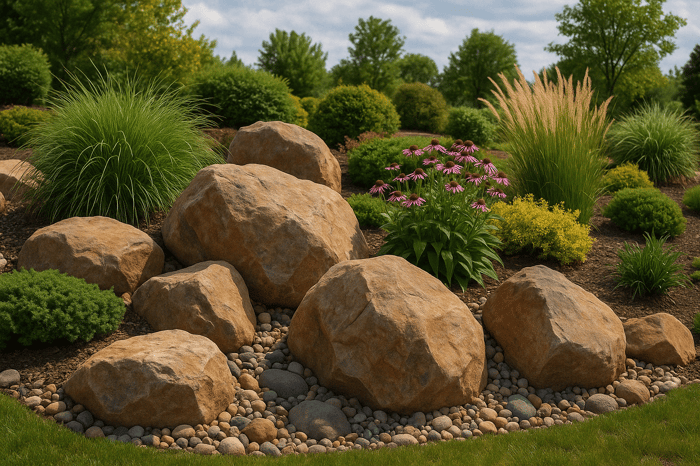
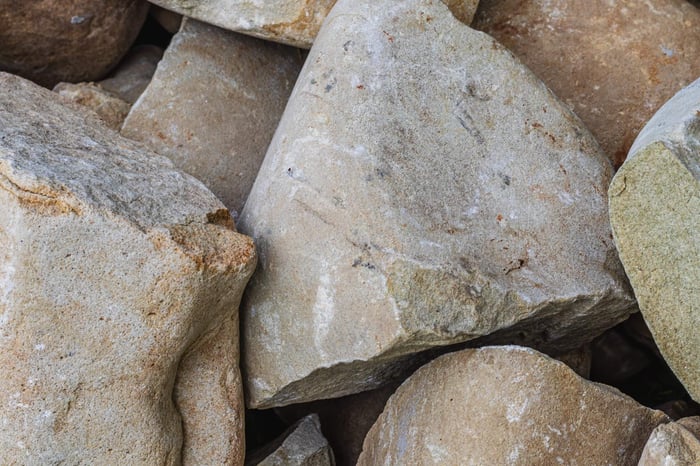
Stone Edging – A natural and long-lasting option that blends well with flower beds and walkways. How to install landscape stone edging depends on the type of stone, but it generally involves a solid base for stability.
Brick Edging – Traditional, sturdy, and customizable. Bricks for landscape edging can be laid in different patterns, allowing for a classic or decorative finish.
Gather the Tools and Materials Needed
The right tools and materials make the installation process much easier. Instead of scrambling for missing items midway, a little preparation ensures a smooth workflow.
A shovel is essential for digging the trench, while a rubber mallet helps secure materials without damaging them. A measuring tape ensures even placement, and a level keeps everything aligned. Landscape stakes provide extra support for flexible edging, while a trowel is helpful for fine adjustments.
The materials will depend on the type of edging you choose. Metal strips and stakes create a sleek and modern border, while stone, bricks, or pavers offer a more classic and sturdy look. A sand or gravel base adds stability, especially for stone edging. Other options, such as wood, plastic, or recycled materials, can also work well, depending on the style you want to achieve.
Prepare the Ground for Installation
Before installing landscape edging, the ground needs to be properly prepped. Skipping this step can lead to uneven placement or shifting over time, so a little upfront effort will save much frustration later.
Start by marking the edging layout using string, stakes, or spray paint. This helps create a clear guide and prevents any guesswork during installation. Once the outline is set, dig a trench along the marked line. The depth will depend on the type of edging—metal strips typically need a shallow trench, while landscape edging stone or bricks require a deeper base for stability.
Remove grass, weeds, or debris from the trench to create a solid foundation. If using stone or bricks, consider adding a layer of sand or gravel at the bottom to keep everything level and prevent shifting.
Install the Edging
Now comes the fun part—installing your chosen edging! Whether using metal strips, stone, or flexible materials, this step is about precision and securing everything in place.
For metal edging, start by placing the strips along the trench, following your marked layout. Secure the strips with stakes, ensuring they're evenly spaced and aligned. Use a rubber mallet to tap the stakes into the ground gently, keeping everything level and straight.
If you're going with stone or brick edging, lay down a thin layer of sand or gravel at the bottom of the trench. This helps with leveling and stability. Position the stones or bricks carefully, ensuring they're evenly spaced and aligned. Tap each piece into place using a mallet, ensuring they're secure and level.
For flexible edging materials, adjust the shape as needed to fit the contour of your trench. Secure the edging with stakes, making sure it stays firmly in place. Once everything is in position, check for stability by gently pressing down or wiggling the edges. If any parts seem loose, make adjustments until everything feels secure.
Secure and Finish the Edging
Now that your edging is in place, it's time to give it a final check and ensure it's as solid as it looks. Start by stepping back and checking the alignment one last time. Make any small adjustments to keep everything straight and uniform. Even a tiny shift can make a big difference, so take a moment to perfect it.
Next, backfill the area around the edging with soil or mulch, depending on your preference. This will give the edging a clean, seamless look and help hold it in place. Make sure to fill in any gaps between the edging and the ground, smoothing it out as you go.
To finish, compact the materials gently. Using stone or brick edging, tamp down the soil or mulch to secure the materials. For metal edging, you may need to press down more firmly to ensure everything stays in place long-term. A tight finish will prevent shifting and ensure your edging looks excellent for years.
Maintain Your Landscape Edging
You've worked hard to get your landscape edging looking great—now it's time to keep it that way. Proper maintenance ensures that your edging stays in place and continues to do its job year after year.
Start by regularly checking for any shifting. For instance, metal edging can sometimes move over time, especially with weather changes. If you notice any misalignment, simply tap the stakes back into place. Keeping the area around your edging clear of debris also helps prevent unwanted shifts.
Weeds are another common issue, especially when dealing with stone or brick edging. Apply a weed barrier fabric or use mulch to reduce growth between the cracks. Just be sure to remove any stubborn weeds before they have a chance to spread.
Seasonal care is essential, too. Inspect materials like metal edging each season for rust or wear and tear. A little touch-up paint or sealant can go a long way in extending the life of your edging. On the other hand, brick or stone may need a quick cleaning to keep them looking fresh.
Finally, over time, your edging may need a little refresh. If some sections have cracked or become damaged, don't hesitate to replace them. A quick swap of a few stones or bricks can make your garden look as good as new.
Final Thoughts - How to Install Landscape Edging
Installing landscape edging doesn't have to be complicated. With the right tools, materials, and effort, you can create a neat border that enhances your yard's appearance while providing a long-lasting solution.
Remember to choose the edging material that best suits your style, budget, and maintenance preferences, and always keep up with routine care to ensure its durability.
Looking for high-quality materials to get started? Let Crystal Landscape Supplies assist you with everything you need to make your landscape project successful! Contact us today!